In music production, there are two main aspects that make the difference between an amateur production and a professional one: a balanced frequency range and a good dynamic range in the song. A balanced frequency range can be achieved with the help of equalizers, while dynamics devices such as compressors, noise gates or even limiters are responsible for the dynamic range.
What is a limiter?
A limiter is nothing more than a compressor with very high ratios, up to ∞:1 - that is, it does not allow levels above a certain limit to pass. You can think of it as a maximum volume limit in an audio track - anything louder than the limit will not pass.
A compressor usually works with a ratio of 2:1 to 20:1 - this means that every dB above the set limit is attenuated by 2 (at a ratio of 2:1) or 20 (at a ratio of 20:1). Limiters have a ratio from 50:1 (normal limiter) to ∞:1 (brickwall limiter) - this means that every dB above the limit is completely attenuated/does not pass at all.
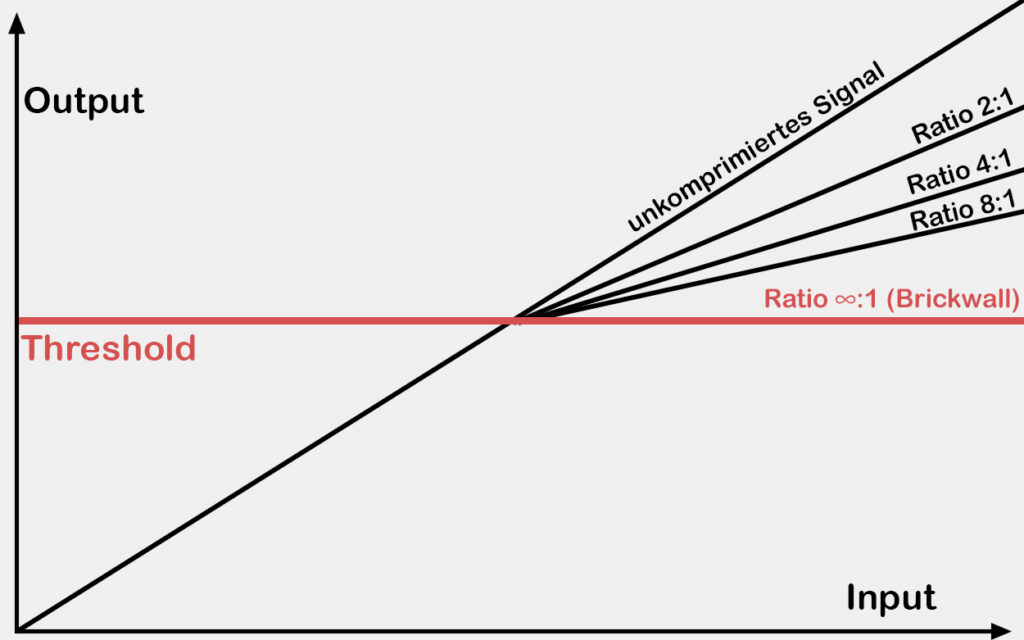
At the latest during the mastering or remastering process, limiters come into play, which have two main purposes:
- As mentioned earlier, limiters make sure that no levels go over the limit, so that no distortion occurs in the audio that could damage the speakers or even your ears.
- However, a limiter also increases the perceived overall volume of the track (see LUFS) because, like any compressor, it makes quiet passages louder. The result is that the whole track sounds louder, because more parts of the track are close to the maximum volume and the dynamic range is reduced.
This is especially important in today's world, where music has gotten so loud that without a limiter, you would never reach that volume.
Limiter settings
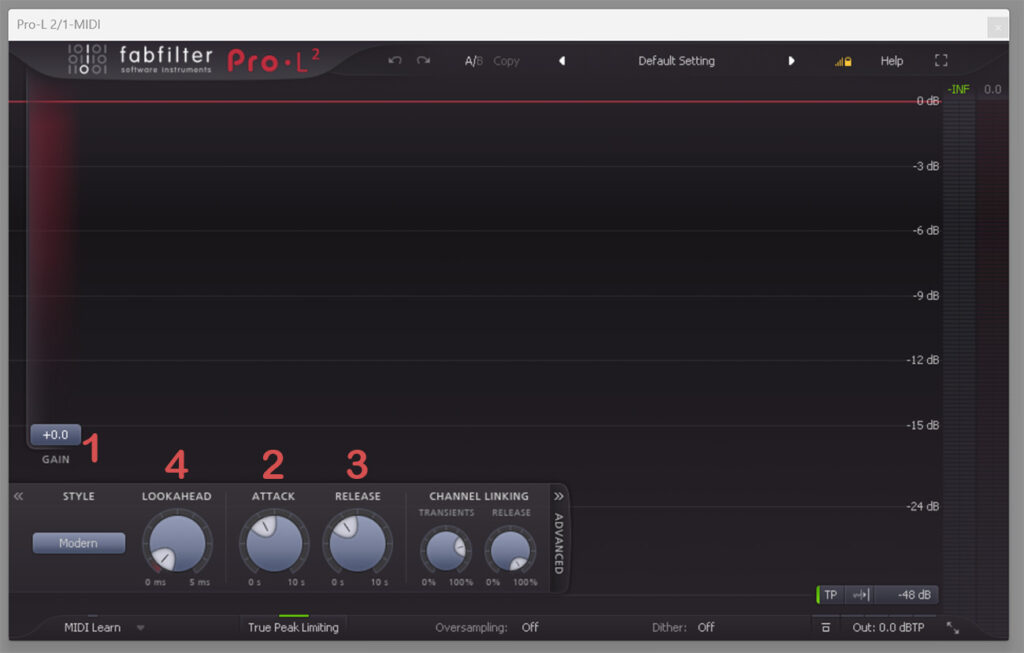
A limiter has similar settings to a compressor - after all, they work in the same way:
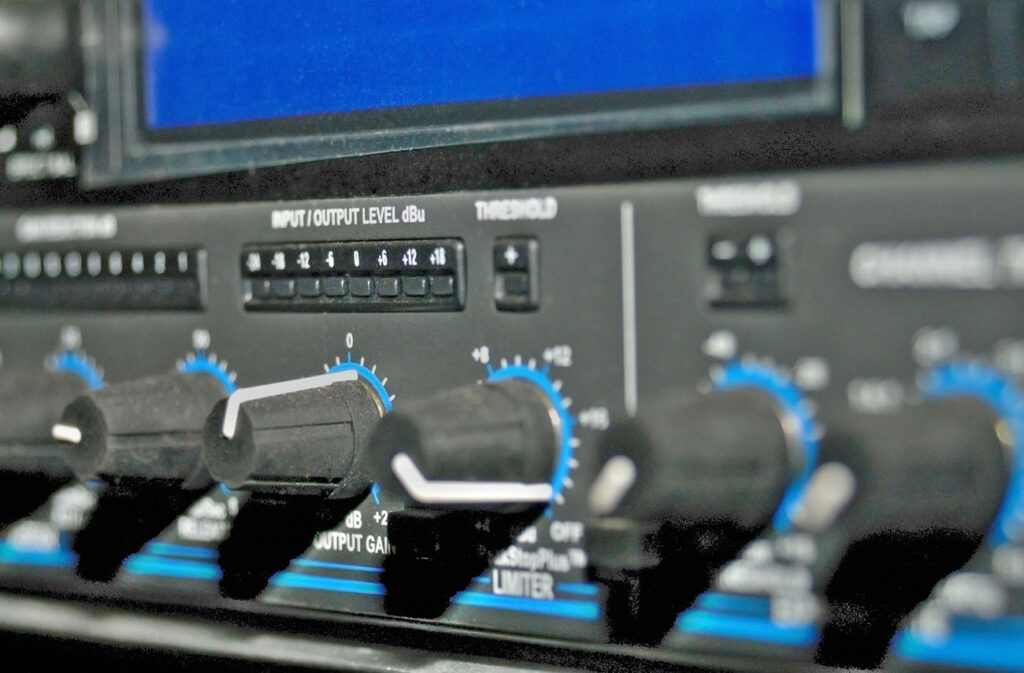
- The threshold determines the volume at which the limiter begins to operate. Anything above the threshold will not pass and will be reduced to the maximum level allowed. Usually modern limiters automatically adjust the makeup gain, otherwise there are separate controls for it. Often, the combination of threshold and makeup gain is simply called gain.
- The attack time determines how quickly the limiter intervenes when the signal exceeds the threshold. If you want to be sure that nothing exceeds the maximum level (e.g. in the mastering phase), you should choose very short attack times. With long attack times, the first transients will pass through because the limiter intervenes later. Many limiters do not allow you to change the attack time - they always work with short attack times to capture all transients.
- The release time determines how quickly the limiter stops working when the signal falls below the threshold. Fast release times sound unnatural because the gain reduction stops very quickly and abruptly, but are used to modify transients, e.g. to make drums hit harder. Slow release times sound more natural and are therefore most often applied to entire songs in the mastering phase.
- Some limiters have a lookahead. This gives the limiter a "look into the future" of the audio signal, ensuring that it always cuts all levels accurately, regardless of the speed of the transients. Without lookahead, some peaks may pass through even at the fastest attack time.
What is a True Peak Limiter?
A true peak limiter is a special type of limiter often used in mastering. The special feature of a true peak limiter is its ability to detect and limit "inter-sample peaks". Inter-sample peaks are peak levels that can occur between two digital samples when the digital signal is converted to an analog signal.
Conventional limiters can miss these peaks because they only consider the samples actually present in the digital file.
Inter-sample peaks can cause unwanted distortion when the audio signal is played back on certain systems or converted to lossy formats (such as MP3 or AAC). A true peak limiter can detect and limit these peaks, resulting in better audio quality and consistency across different playback systems and formats.
What is oversampling?
Oversampling is a technique used in limiters and other digital audio processors to increase the resolution and quality of audio processing and reduce artifacts such as aliasing and inter-sample peaks.
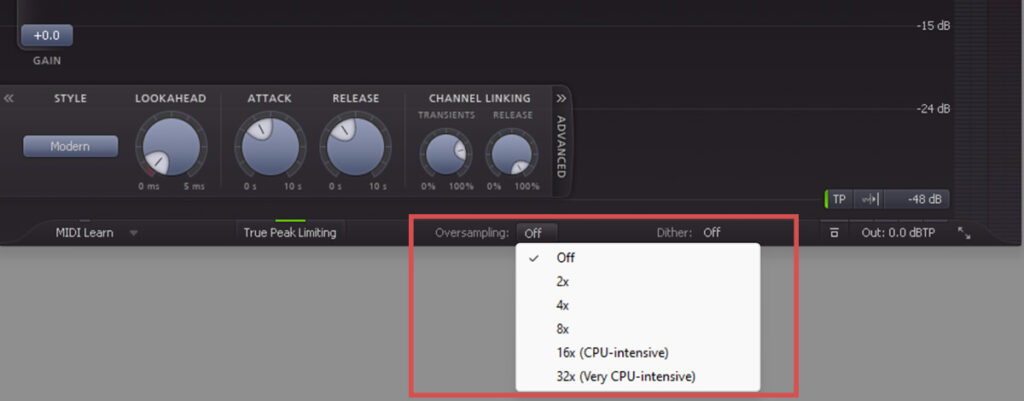
Here's how it works: Oversampling increases the sampling rate of the audio signal, often by a factor of 2, 4, 8,16 or 32. This means that additional samples are generated between the original samples. This gives the limiter a higher resolution and allows it to more accurately detect and limit peaks between samples.
Note, however, that oversampling is very CPU intensive because the sampling rate must be increased - the higher the oversampling rate, the more CPU is required.
Limiter vs Brickwall Limiter vs Clipper
Basically, there are 3 different types of limiters that have a similar function but work slightly differently.
A normal limiter is a compressor with very high ratios (30:1 - 50:1) and extremely fast attack times close to zero. They prevent distortion except at very low frequencies. In terms of audibility, a limiter cleverly boosts quiet passages without raising loud passages above a certain system level.
A brickwall limiter is a type of limiter characterized by an extremely high, possibly infinite, compression ratio (∞:1). This ensures that no signal amplitude ever exceeds the set threshold, acting like a giant wall (hence the name) to protect audio integrity.
A clipper (hard clipper or soft clipper), on the other hand, follows a different circuit design and serves a special purpose. It is specifically designed to prevent the instantaneous value of a signal from exceeding a certain threshold. Theoretically, a limiter can become a clipper if it is set to a ratio of ∞:1, an attack time of zero, and a release time of zero.
The main difference between a limiter and a clipper is the way they work: a clipper acts on the instantaneous value of a signal, while a limiter acts on the signal level or gain over a period of time, roughly defined by the release time.
When should you use limiters?
Limiter during mastering
As mentioned earlier, limiters are most commonly used in mastering, and there are several reasons for this:
- Volume control: A limiter helps increase the volume of a track without overdriving it. This is especially important at a time when volume is often considered a crucial factor in the success of a song.
- Avoidance of distortion and clipping: As the volume increases, there is a risk of overdriving the audio signal, which can lead to unwanted distortion and clipping. Limiters help minimize this risk by cutting the peaks of the audio signal and preventing the signal from rising above a certain level.
- Consistency: A limiter helps create an even, consistent sound. Without a limiter, some parts of a track may be much louder than others, resulting in an uneven listening experience.
- Audio system protection: A limiter can prevent signals that are too loud from damaging audio systems. This can be especially important when playing the master in different environments and on different systems, from small headphones to large PA systems.
- Industry standards compliance: The music and broadcast industries have specific standards for maximum volume. A limiter helps ensure that a master meets these standards.
Limiter during mixing
Limiters are not often used in mixing - compressors are usually used in the mixing phase because they sound more natural. However, there are situations where a limiter can be useful:
- On individual drum samples: If you want to change the sound of a drum sample extremely, a limiter can help. If you want an extremely squashed sound, say for the snare, you can either compress the snare extremely or you can put a limiter on it.
- Parallel compression: Limiters also work well with parallel compression. The technique is to compress a track or group extremely and then mix the compressed signal with the uncompressed one - a limiter is very good for this because the effect is so extreme.
- Deliberate distortion: You can also use it to distort instruments by pushing the volume above 0 dB. After that, you can always compensate and reduce the volume with Makeup Gain or another plugin to hear the distortion at lower volumes.
I would not recommend using a limiter on the master bus during the mix - that should be left to the mastering engineer. If you are the mastering engineer, I still wouldn't use a limiter during the mix, but only after the mix is done and you start mastering.

