What is an audio compressor?
A compressor is an audio effects device responsible for manipulating the dynamic range of an audio track. Dynamic range is the difference between the loudest and quietest parts of an audio track.
A compressor reduces the dynamic range by making the loudest parts quieter and making the quiet parts seem louder. The result is a smoother sound that is pleasant to listen to (as long as you don't push it too far and take out all the dynamics).
How does an audio compressor work?
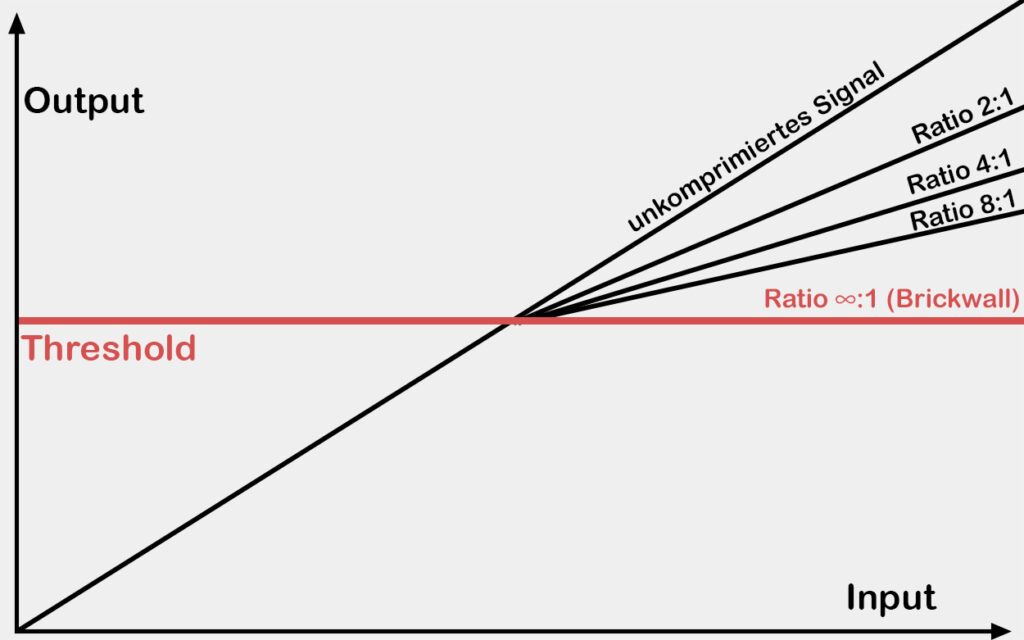
Audio compressors always have a threshold, which is the level at which the compressor starts working, and a ratio, which determines how much the signal is compressed when it exceeds the threshold. For example, a ratio of 4:1 means that when the input signal exceeds the threshold by 4 dB, the output signal is only 1 dB above the threshold. The higher the ratio, the more the signal is compressed.
This compresses (reduces the volume of) the loudest parts (everything above the threshold).
But why are the quiet parts made louder?
It is a common misconception that an audio compressor makes the quieter parts of an audio signal louder. What a compressor actually does is make the louder parts of the signal quieter in order to reduce the dynamic range.
However, after compression, a "make-up gain" or "output gain" is often used to bring the overall signal back up to the desired level, since the compressed signal will otherwise be much quieter than the original. Since the louder parts of the signal are now quieter, it looks as if the quieter parts have been made louder. In reality, however, the entire track, including the previously loud parts that were compressed, has become louder.
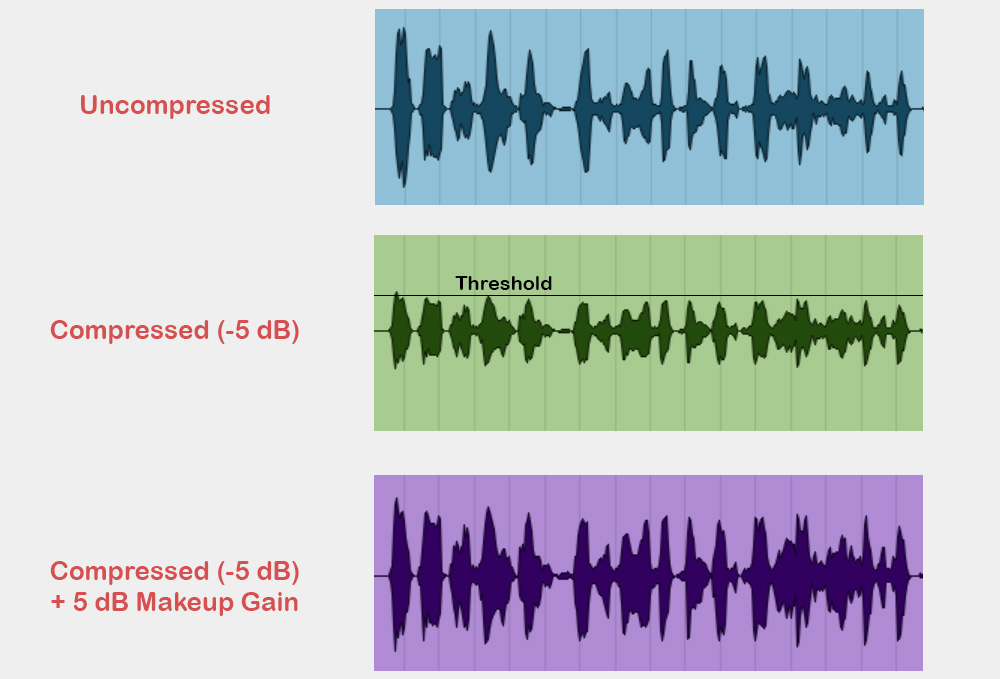
By compressing and then boosting the signal, the quiet parts of the track are brought closer to the volume of the loud parts, which is often perceived as boosting the quiet parts.
Also interesting: Recording Drums - A Step-by-Step Guide
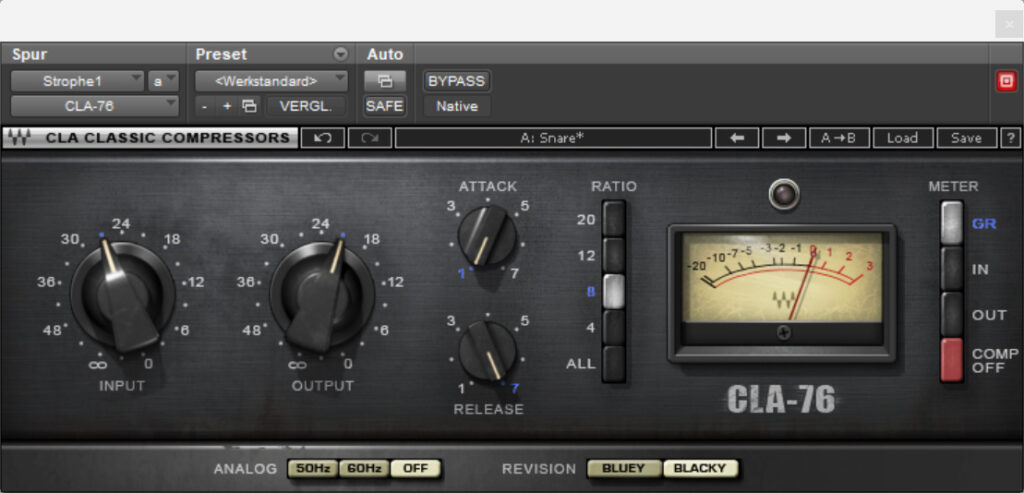
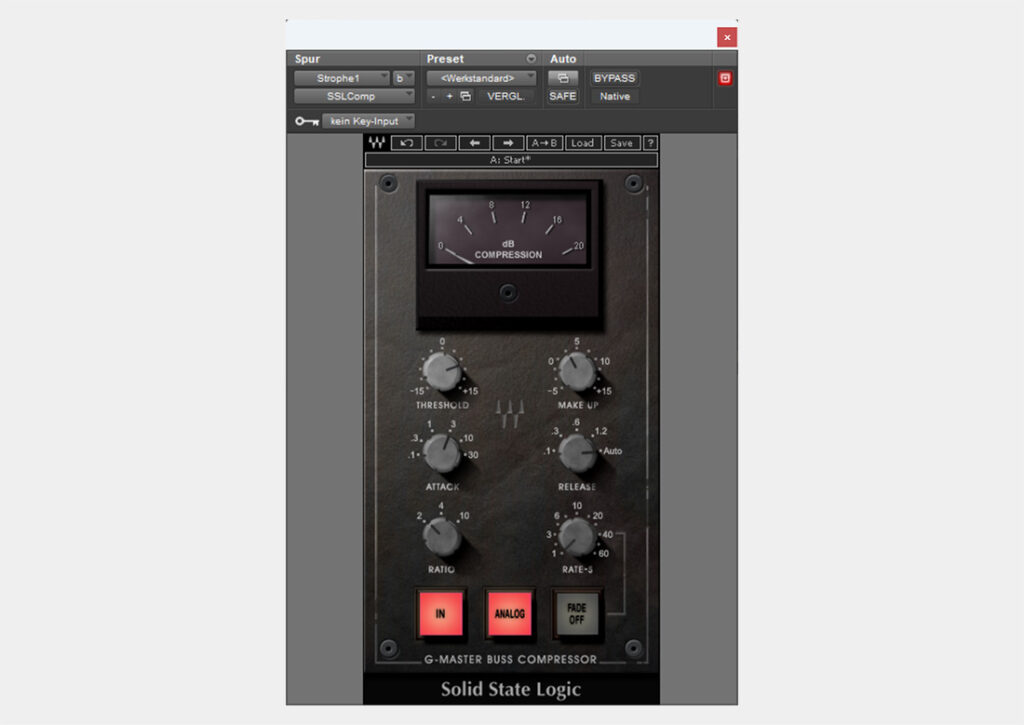
Parameters of a compressor
Basically, there are 6 important parameters in an audio compressor that can be adjusted:
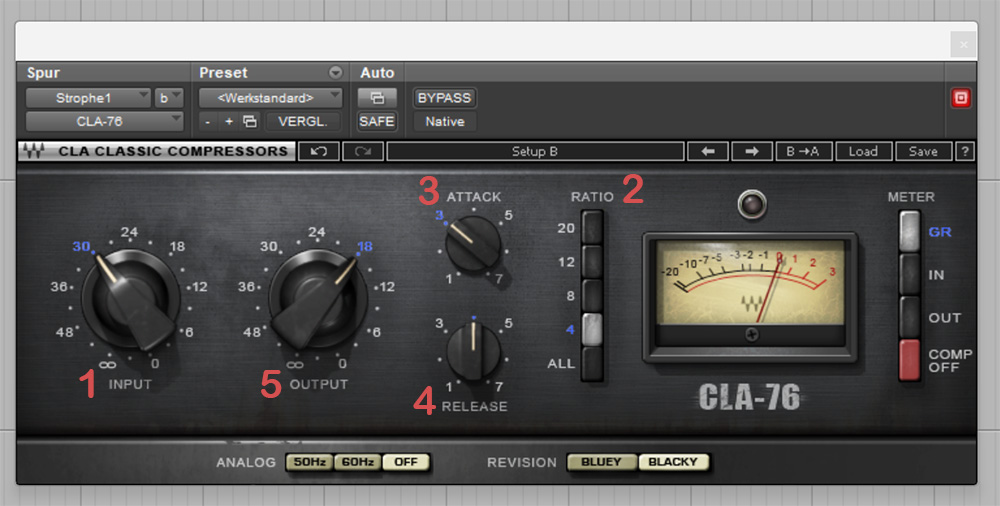
- Threshold (Input): This is the level at which compression begins. If the audio signal exceeds this value, compression will be activated. A lower threshold means that more of the audio signal is compressed because the limit is lower.
- Ratio: Specifies how much the signal is compressed when it exceeds the threshold. For example, a ratio of 8:1 means that if the input signal exceeds the threshold by 8 dB, the output signal is only 1 dB above the threshold. A higher ratio means more compression.
- Attack time: This is the time it takes for the compressor to react to the threshold being exceeded and start compressing. A short attack time means that compression starts quickly, which is helpful for controlling abrupt peaks. A longer attack time allows more of the original signal to pass through before compression begins, resulting in a more natural sound because more of the original signal's transients pass through uncompressed.
- Release time: This is the time it takes for the compressor to stop compressing after the signal falls below the threshold. A short release time causes the compressor to stop compressing more quickly, which can result in an irregular sound (known as "pumping"). A longer release time keeps the signal compressed longer.
- Make-up Gain or Output Gain: After compression, the Output Gain can be used to boost the entire signal to the desired level. This brings the quiet parts of the signal closer to the volume of the loud parts.
- Knee: Some compressors have a "knee" setting that determines how the compressor reacts when the signal reaches the threshold.
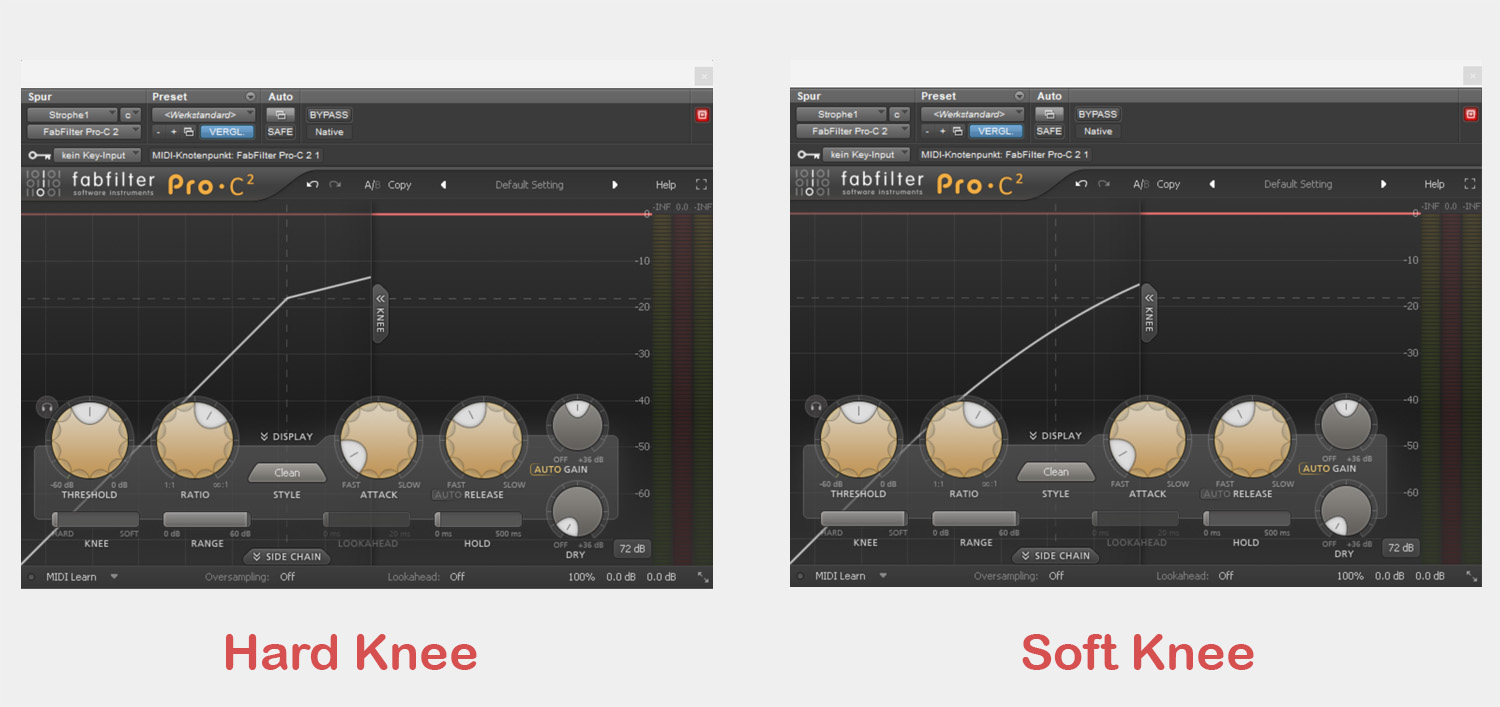
With a hard knee, compression begins immediately and at full strength as soon as the signal crosses the threshold. This is particularly useful when abrupt peaks or loud transients in an audio signal need to be quickly and effectively reduced. However, it can also result in an unnatural or "harsh" sound because the transition from uncompressed to compressed signal is very abrupt.
With a soft knee, compression starts slowly and progressively as the signal approaches the threshold, and reaches full strength only when the signal has exceeded the threshold by a certain amount. This results in a more natural and smooth sound because the transition from uncompressed to compressed signal is smoother. However, it is less effective at controlling abrupt level spikes because it takes some time for full compression to take effect.
Why do you need an audio compressor?
Compressors are very versatile because they can perform many functions. In addition to volume adjustment, they are also used for general volume boosting and for manipulating transients in an audio track.
Volume balance
In modern productions of most genres (except classical), the music is expected to have a certain dynamic range, which is not particularly large. That is, the song should sound as evenly loud as possible over its entire length - of course there should be highs and lows, but the dynamic range is about 6 dB.
This means that many instruments and the voice need to be compressed so that the differences between the loudest and softest parts are not too great. This is especially important for vocals, because the human voice has a wide dynamic range. When you sing high, you usually sing louder than when you sing low - and a compressor can do a very good job of correcting these differences.
With an audio compressor, we can also make sure that the bass drum and snare drum sound the same on every beat. This gives the track more stability and uniformity - a must for any modern rock, pop, EDM or hip-hop production.
Here is a table of common dynamic ranges for popular music (These are averages, there are always exceptions):
| Genre | Dynamic range |
|---|---|
| Pop and Rock | 6 to 8 dB |
| Hip-Hop and Electronic Music | 5 dB or less |
| Classical music and jazz | 12 to 14 dB |
| Country and Folk | 8 to 10 dB |
General volume increase
As mentioned earlier, an audio compressor can increase the overall volume by lowering the loudest levels and increasing the overall volume via the makeup gain. This keeps the loudest parts at the same volume (but without the peaks), but makes the quieter parts louder.
The result is that the average or "effective" volume of the audio track is higher, even though the actual maximum volume (or peak level) has not necessarily been increased. This results in an increased "perceived" volume because most of the audio track now sounds louder.
This method is mainly used in mastering. Compressors with very high ratios, also called limiters, are used for this purpose because they can completely cut off the loud peaks.
Transient editing of a track
Transients are the initial peaks or "attack" phases of sounds that occur very quickly and briefly, such as the instantaneous strike of a snare drum or guitar string. They are often very loud compared to the rest of the sound and play an important role in defining the character and timbre of a sound.
An audio compressor can be used to manipulate transients in an audio track by attenuating or accentuating these peaks.
If you choose a long attack time, the compressor will kick in later, allowing the first transients of the sound to pass through. If you then compress and equalize the volume, these transients become louder while the rest of the sound is compressed.
This effectively boosts and emphasizes the initial transients. This technique is often used on drum tracks (especially kick and snare) to add punch.
But it also works the other way around: If you choose a fast attack time, the initial transients will be captured and reduced. This takes some of the punch out of the sound, which you don't really want, but it can be helpful in some situations. For example, with guitars that sound too "sharp" and should be more in the background.
How do I set the audio compressor?
The first thing to consider is why you are using the compressor and what you want to achieve with it. This is because different settings are needed for different purposes. Here are some situations where a compressor is useful and the different settings you need for them.
Compression of the vocals for a homogeneous sound
In pop, rock or hip-hop music, vocals are usually compressed to achieve a homogeneous sound throughout the track. To do this, a medium attack time and a fast release time are usually chosen in order to change the transients of the voice as little as possible.

Then slowly reduce the threshold until the desired compression is achieved. If the vocals require a lot of compression, I recommend using multiple compressors in series, each reducing 3-4 dB of gain. This sounds more natural than having only one compressor reduce 8 dB of gain.
It is also recommended to use a low ratio (e.g. 2:1 or 4:1) and a slightly lower threshold to achieve the desired compression - this will also sound more natural than the same amount of compression with a higher ratio and a higher threshold.
Then you need to balance the volume with Makeup Gain to bring the voice back to the level required for your mix.
This technique can also be used for guitars, pianos, or other instruments that require a more homogeneous sound.
Drum compression for more punch
In modern music productions, drum tracks are often heavily compressed to make them sound really punchy. Powerful drums are important for a solid beat in a song.
To achieve this, choose a slow attack time and a fast release time to let the initial transients through and emphasize them more. The higher the ratio, the more "punch" the sound gets, but you don't want to overdo it so the track doesn't sound squashed. A ratio of 4:1 or 8:1 is a good starting point.
Then do the same again: Slowly reduce the threshold until the desired compression is achieved, then compensate with makeup gain.
If you need a lot of punch, you can also use parallel compression: This technique involves compressing the track extremely hard and then mixing the compressed track with the uncompressed track. You can use the same settings, but with a very high ratio (20:1).
Some compressors have a dry/wet control that allows you to mix the uncompressed and compressed tracks - if not, you will have to work with aux tracks or duplicate the track.
These techniques can also be applied to other instruments (e.g. bass) if you feel they need more punch. They can be applied to individual instruments or entire groups.
Subtle compression on the entire mix
In the mixing (or even mastering) phase, a compressor is often placed on the master bus to glue the various elements of the mix together into a unified, professional-sounding whole.
However, you have to be very careful, because a compressor on the entire mix can ruin a lot if set incorrectly. It is best to use the lowest possible ratio (1.5:1 or 2:1) and a long attack time (about 30ms) so that all transients come through uncompressed. The release should be adjusted individually or simply set to "Auto" - it is important that there is no pumping effect.
Finally, compensate the compression with makeup gain by increasing the gain by 1-2 dB.
A trick for adjusting the audio compressor
Most compressors color the signal in some way (they are often preferred for this reason, especially tube compressors), but if you're not sure exactly how they color your signal because you may not have much experience, here's what you should try.
You set the threshold very low so that the compressor compresses extremely hard to hear how it colors the signal. At extreme settings, the coloration is much clearer and more obvious than at subtle settings - so you can easily judge whether this audio compressor is suitable for this situation. Afterwards, the threshold can be set back to a normal value.