The term "vocal chain" refers to a series of devices used in the recording and mixing of vocals to make the vocals in a song sound as good as possible. Since the vocals are always the most important part of a song, this topic gets a lot of attention. Especially young producers always want to know what vocal chains certain artists use to imitate their sound.
That's not a bad thing, learning from better producers is always helpful. However, you should always check for yourself whether this "well-known" vocal chain is suitable for your own situation, because every voice is different. What works wonders for one singer can completely ruin the performance of another.
That's why I always advise against blindly copying settings. Even if your favorite producer compressed your voice with 3 different compressors on his last track to make it sound really fat - this might be too much for your vocals if your voice is naturally much more powerful.
What does the vocal chain include?
The vocal chain usually includes the vocal microphone, the preamp, the A/D converter, and any effects used during recording or later during mixing. Of course, room acoustics also play an important role in recording, but they are not part of the vocal chain. Good room acoustics are a prerequisite.
Without good room acoustics, it's very difficult to get perfect sounding vocals because room reflections are always audible to some degree. If you want to know how to improve your room acoustics on a budget, I recommend my DIY guide to improving room acoustics.
Vocal microphone
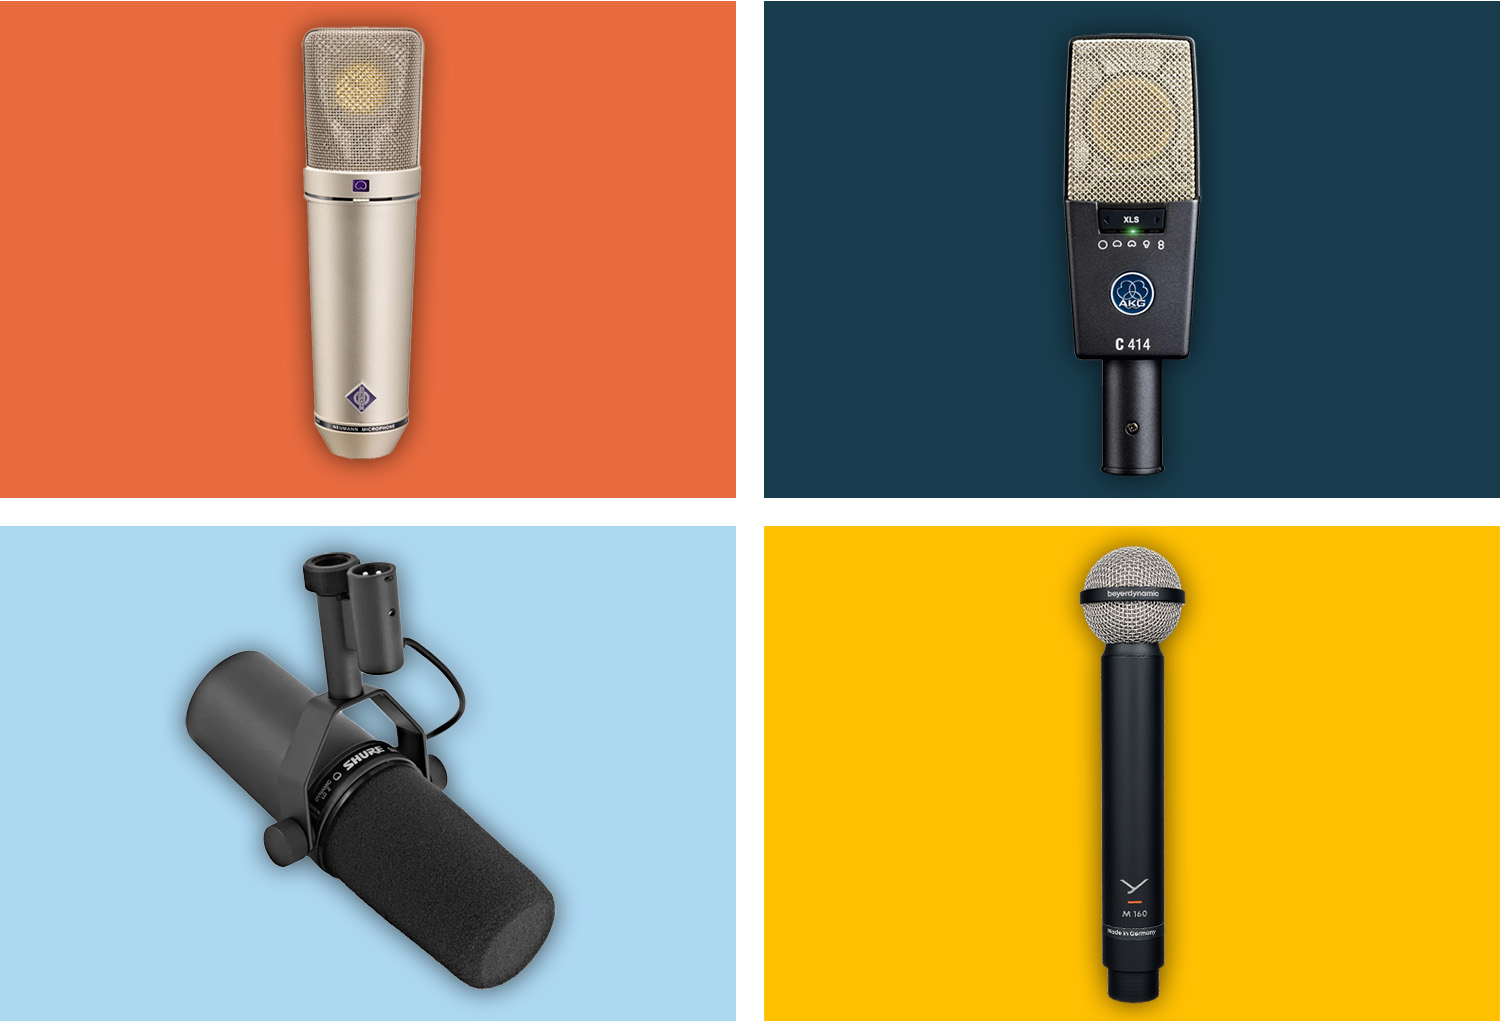
The subject of vocal microphones can be very complex because every voice, like every room, has unique requirements. If your room is not acoustically ideal, you should definitely use a dynamic microphone like the Shure SM7B.
If the acoustics in your room are good, you should choose a condenser microphone as it can pick up more detail and has a wider frequency response.
As a beginner, you normally want a microphone that is as neutral as possible so that you can get to know the voice as well as possible. A neutral microphone also gives you the most options when mixing later on. Good neutral condenser microphones are available in every price range, for example the Rode NT1A (179€), the AKG C214 (398€), the Neumann TLM 103 (1039€) or the Neumann U87Ai (2699€).
If you know your voice a bit better, you can try using sound coloring microphones, which change the timbre of your voice a bit. You are then more limited when mixing, so you need to know beforehand if this timbre will work with your voice in the song (so you need to know your voice very well).
Microphones that color the sound are tube microphones, ribbon microphones or modeling microphones like the Slate Digital ML-1, which I can highly recommend.
Because this is such a complex topic, I've written a comprehensive comparison of the best vocal microphones. Check it out if you're looking for one!
Preamps
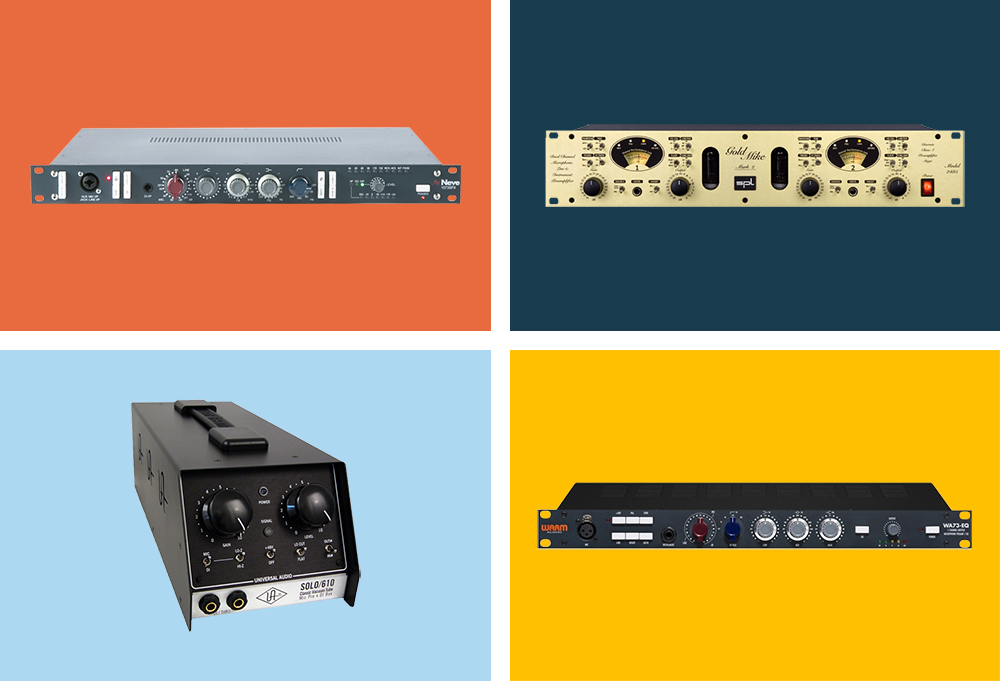
The next important element in the vocal chain is the preamplifier. Its job is to amplify the microphone signal and bring it up to a level we can work with.
Again, the subject is very complex - there are over 300 different preamp models. The Neve 1073, which has been considered one of the best vocal preamps for decades, is particularly popular for vocal recordings.
If you're on a budget, you can also record using the preamp of your audio interface; all modern audio interfaces have relatively good preamps.
If you want to learn more about the best preamps, I recommend my in-depth article on preamps.
AD converter
The A/D converter also plays a role, although less important than the microphone or preamplifier. The AD converter's job is to convert the analog signal (electrical waves) into a digital signal (digital sampling). The sampling rate and bit depth are of course very important.
Most modern interfaces have high-quality converters that can easily handle 24 bits and sample rates up to 192 kHz. You can therefore use any modern audio interface as an AD converter - even the inexpensive Behringer interfaces can do the job well.
Effects
Effects like compressors and EQs can of course be used during recording - especially when using analog effects, they are placed between the preamplifier and the A/D converter to capture the timbre of the effect.
It's good if you know exactly what effect you want, but you're limited when you mix because you can't get that sound color out of it. That's why I'm more in favor of recording without effects and using all the effects later in the mix.
De-esser
The first step is often to use a de-esser to reduce sibilants. When recording vocals with condenser microphones, these high frequencies are often a bit unpleasant, as these microphones are very detailed and often have a little boost in this frequency range. But every singer is different-not everyone needs a de-esser.
A de-esser is a compressor that affects only a specific frequency or a small range of frequencies. This is the range where the sibilance occurs. For men, this frequency range is about 4.5 kHz, for women about 7 kHz.
Using the de-esser first ensures that you have a clean signal that can be processed further. If the de-esser is used after a compressor, the compressor can amplify the sibilance and make it uncontrollable, so even a de-esser after the compressor won't help much.
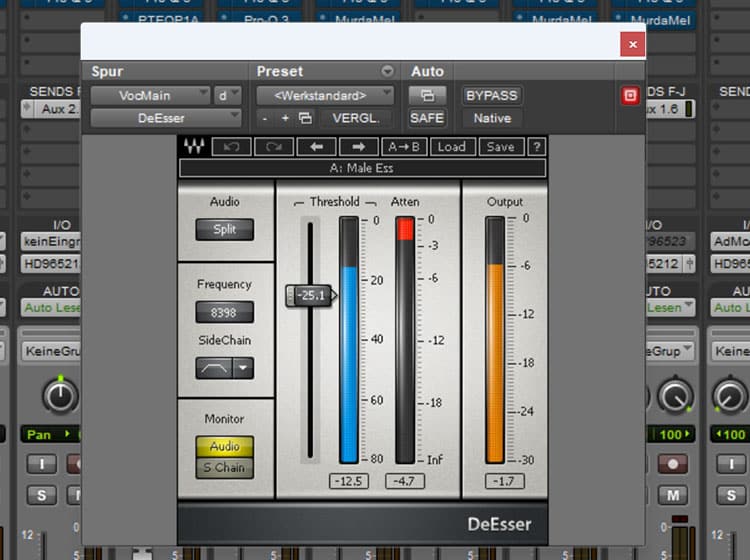
However, this is not always the case - when in doubt, try the de-esser at different points in the vocal chain. Personally, I always set it first.
Compressor
➔ Click here for a detailed article about compressors
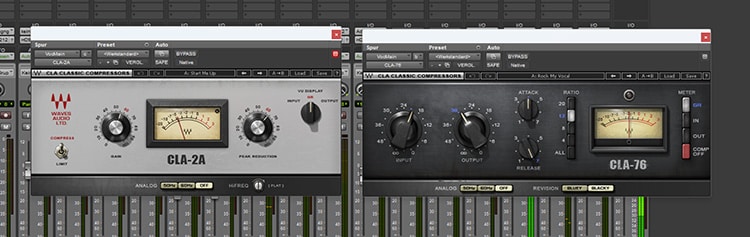
In modern pop and rock productions, a compressor is always used on the vocals to ensure consistent dynamics throughout the song. Most modern music produced today tends to have low dynamics, so the listener expects the dynamic range of the vocal to be correspondingly low. However, this does not apply to acoustic music or jazz.
In addition to reducing the dynamic range of the voice, a compressor can also perform another important task: transient processing of the voice. How often have you heard that a rather "sterile" or "emotionless" vocal recording can be brought back to life with a compressor?
I've had to do this myself many times when a vocal recording, especially in the rap genre, didn't have enough power. With a compressor (or two) set a bit more extreme, you can add a lot of punch and power to a vocal recording. All you need is a slow attack and a fast release to emphasize the initial transients.
But it's not necessary for every vocal recording - if the singer/rapper is good, they naturally have that power and assertiveness in their voice, so you just need the compressor to keep the dynamics under control.
In summary, the compressor fulfills two important tasks:
- It keeps the dynamic range under control - this is often achieved by making the loud passages quieter. This ensures that the vocals don't suddenly sound much louder than usual and startle the listener when they hear the song at home.
- It can also be used to edit the transients (attack, release) of the voice to make the voice more assertive and powerful. This is not necessary in every song, but is particularly popular in hip-hop productions.
If you have to compress a lot and are working digitally (with plug-ins) anyway, I recommend using two compressors with light settings instead of one with extreme settings. This often sounds much more natural than having one compressor do all the work.
Equalizer
➔ Click here for a detailed article about equalisers
Next, an equalizer is often used if the recording requires it. An equalizer can always be used for two different purposes:
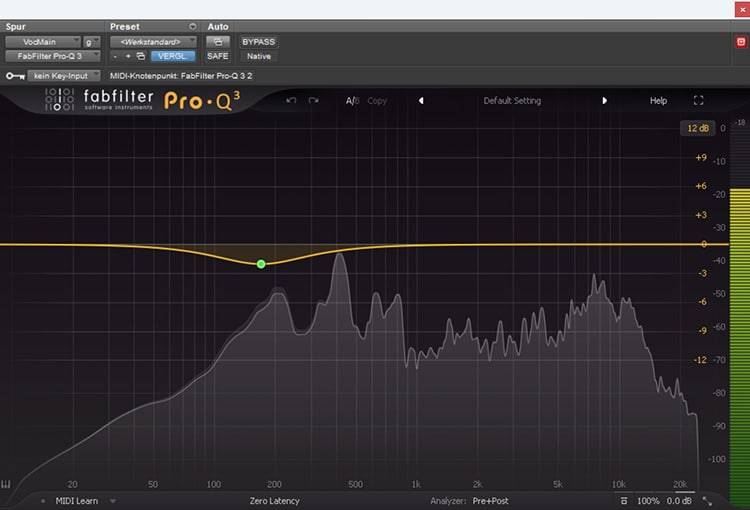
- To correct unwanted frequencies: Very often there are certain frequencies in the recording that are overemphasized and therefore distracting, such as the bass, which is overemphasized due to the proximity effect. This makes the voice sound darker than normal and can even make it unintelligible if it is very pronounced. In this case, an equalizer is used to reduce the low frequencies a bit, and the voice usually sounds clearer, brighter, and more crisp.
- To change the timbre: You can set an equalizer so that it completely changes the timbre of the voice, e.g. by boosting certain frequencies and lowering others. A classic example is the well-known "telephone effect", where the voice sounds like it is coming from an old telephone. The high and low frequencies are completely cut with an EQ, while the frequencies in the high-mid range are boosted. The voice then sounds completely different.
But it is not always necessary to make such major changes - often, for example, the treble range is boosted slightly to make the voice a little "airier".
Personally, I think it's better to use two EQs, one for equalization and one for boosting, so you can quickly turn one off and compare the difference in sound.
There are no magic EQ settings either: What sounds very good for one singer may sound very bad for another singer with a different vocal range. This is where it is important to create your own EQ curves and not rely on "presets" (or at least adjust the presets if you really want to use them).
Personally, I almost always cut the lowest frequencies of the voice a bit (depending on the singer, the range is different, but somewhere between 200 Hz and 800 Hz) to compensate for the proximity effect that very often occurs. When the voice sounds clear and distinct, I use a second EQ where I look for nice frequencies and boost them a bit.
You can do this by creating an EQ band with a lot of gain and "scanning" the frequency spectrum until you find a frequency that sounds particularly nice. Then reduce the gain to a more moderate value (+1 dB to +5 dB).
Pitch correction (also known as Auto-Tune)
➔ Click here for the detailed article about Auto-Tune
Pitch Correction ensures that every note is just right and nothing sounds off. Of course, not every singer needs auto-tune on their voice, but there are certain genres, such as modern pop, where it is simply expected. In rock recordings, for example, autotune is frowned upon.
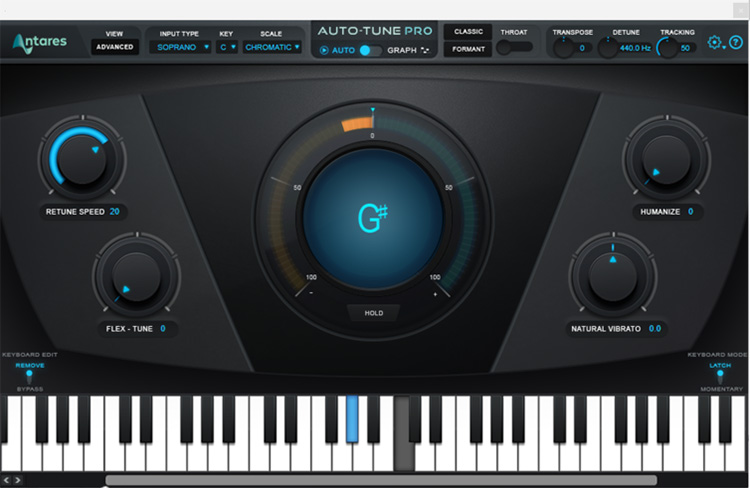
Of course, you can use the well-known Antares Auto-Tune plugin, which automatically adjusts all notes to a given key, or a plugin like Melodyne, which allows you to edit each note individually. There are also many free auto-tune plugins on the market.
Depending on how you set the plugin, the pitch correction effect can be clearly audible (the well-known auto-tune effect that makes the voice sound robotic). Or you can achieve an inaudible correction (provided the original voice is not far from the desired pitch). Whether this effect is desirable depends on the genre and the song, of course.
Reverb
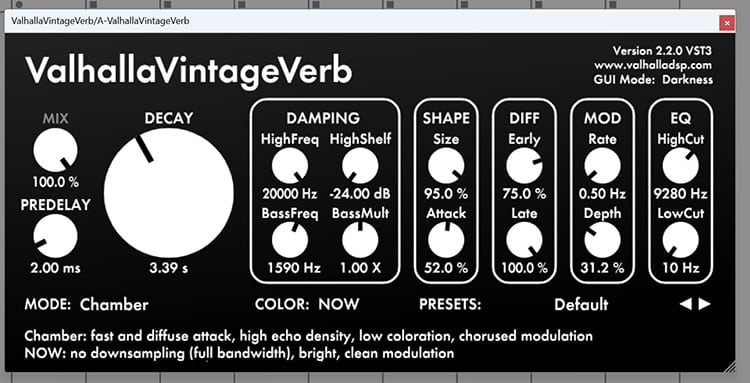
A very important part of any vocal chain is the reverb. The reverb is used to bring a dry voice "into the room" and create a sense of distance/depth. The reverb works through a send channel and not as an insert like the other plug-ins. So you need to create an extra channel for it and use a reverb with a 100% wet / 0% dry setting.
If you give the voice a lot of reverb, it sounds like it is far away. If you use little or no reverb, the vocal sounds like it's right in front of you. You just have to experiment with what works best for each song.
A small amount of pre-delay is always used on vocals to separate the voice from the reverb. A pre-delay simply delays the first reflections of the reverb, ultimately making the effect more subtle.
Normally, the reverb should be so loud that you can barely hear it in the overall mix, but rather feel it. It shouldn't be audible at all in the overall mix, but you should feel it when it's missing. I always try to get to this point gradually, reducing the amount of reverb gradually and comparing the vocals with and without the reverb until I get there.
Of course, this doesn't apply if you want a particularly epic vocal sound, like Travis Scott. In this case, the reverb effect should be clearly audible.
Delay (optional)
The delay effect is also often used subtly on vocals to make them sound a little deeper in the mix or a little wider in the stereo field. Short delay times act almost like a reverb, also known as a slapback delay, while long delay times can be used for transitions or other effects.
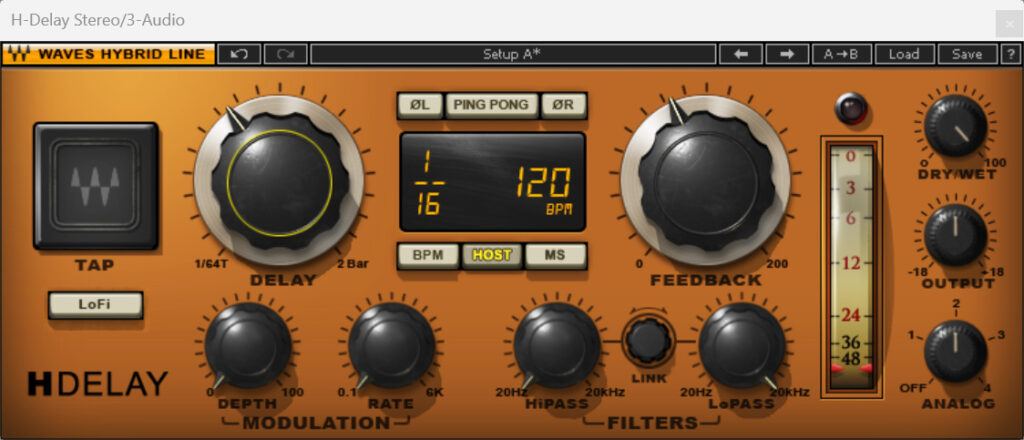
With a normal delay, the voice is repeated, giving the impression that the voice is far away. However, if you use a stereo delay and slightly offset the delay times from left and right, you get a natural and beautiful stereo width. However, this should always be done carefully and only in small amounts, otherwise the voice can sound too unnatural.
Unlike other effects, which are almost always used, you don't need a delay for every song. So think carefully about whether you really need it before you use it.
Vocal chains from well-known producers
The producer ivanfromrnd posts very cool interviews with well-known producers on his Instagram page, asking them about their vocal chains, favorite plugins and the like. I picked out interviews with famous producers where he asks them about their vocal chains for famous artists.
1. Kanye West (Producer: Randy Urbanski)
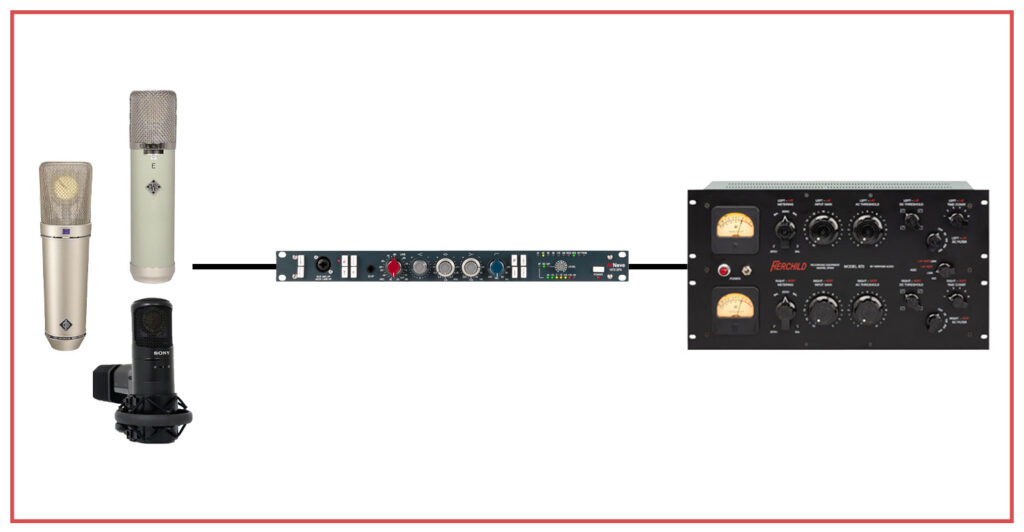
In this post, he asks Randy Urbanski, who has produced for Kanye West among others, which vocal chain he uses. His answer:
- Microphone: Sony C800G (approx. €12,000), Neumann U67 (approx. €7500) or Telefunken ELA M 251 (approx. €12,000)
- Preamp: Neve 1073 (approx. 1700€)
- Compressor: Fairchild 670 (approx. €70,000 at the time)
As you can see, such a vocal chain can be very expensive - only few people can afford such equipment. However, you can also recreate this vocal chain inexpensively using plugins/modeling microphones.
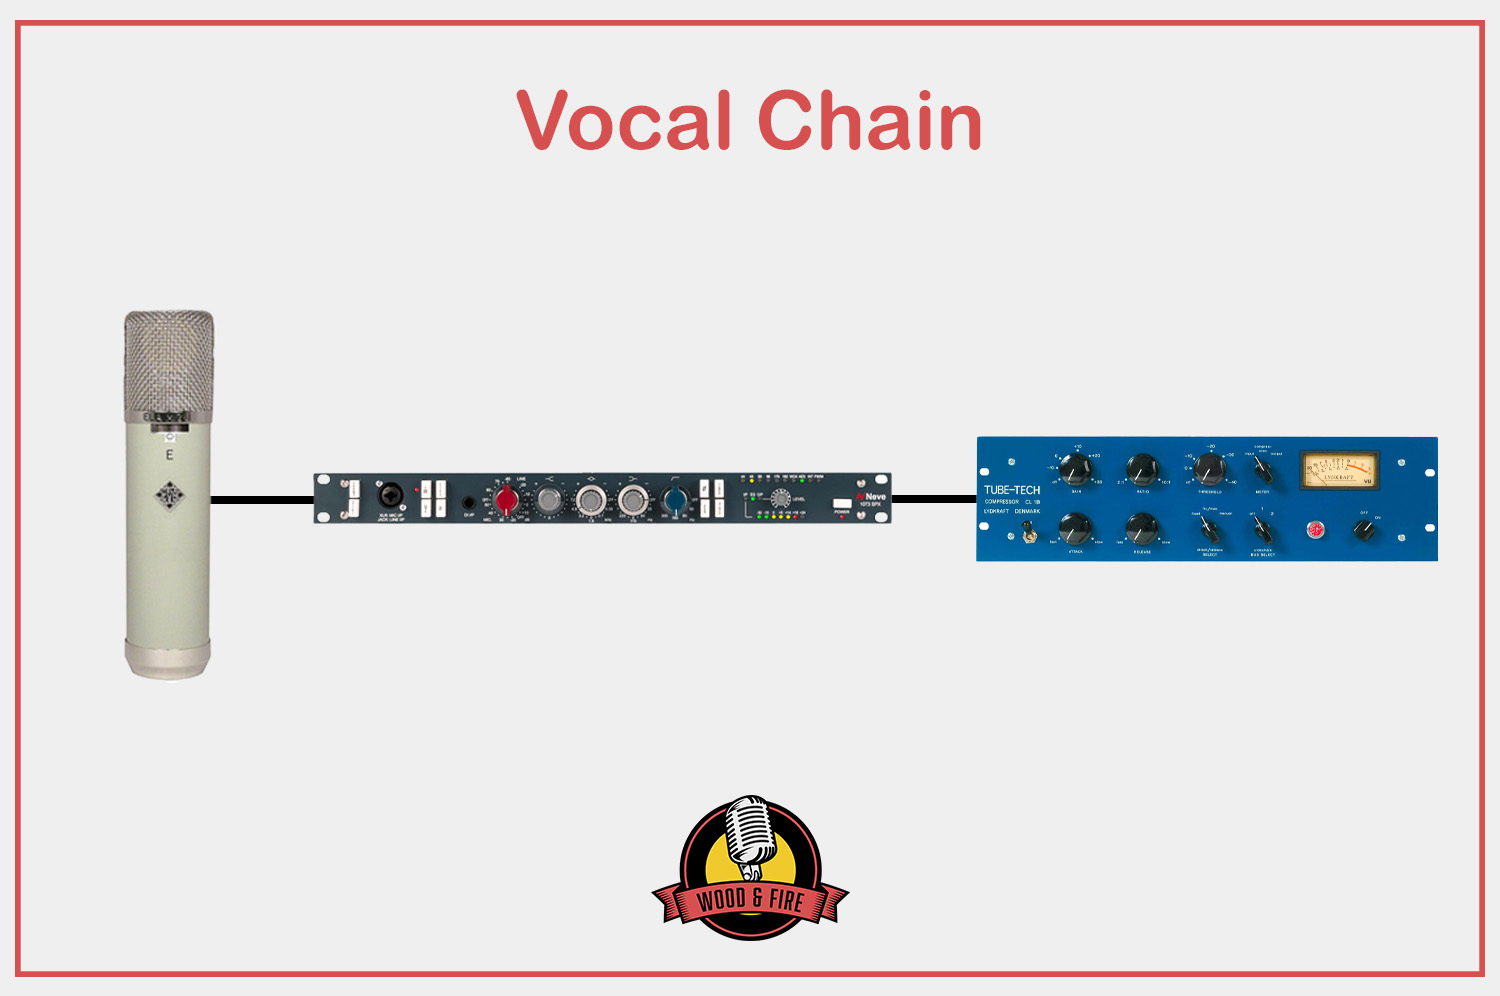
2. NLE Choppa (Producer: Aaron Mattes)
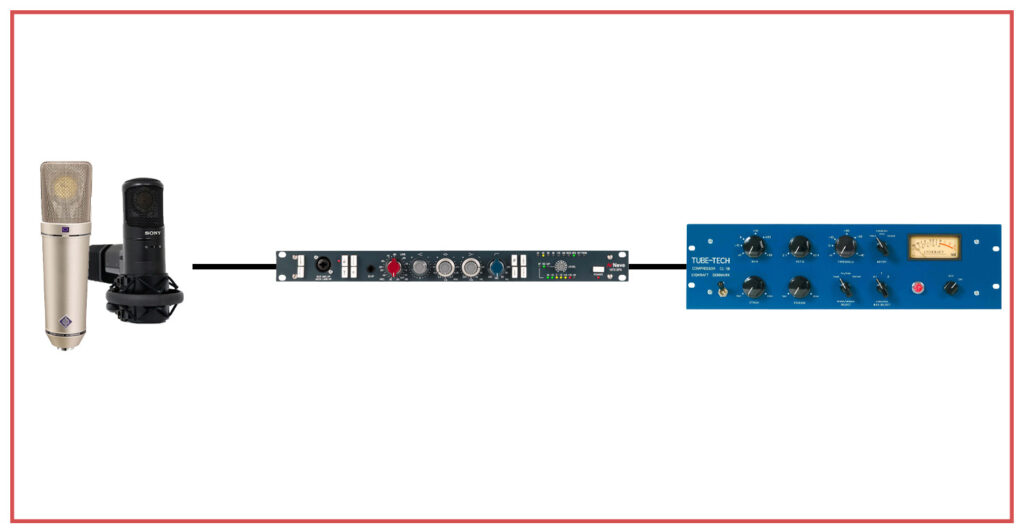
In this post, he asks Aaron Mattes, who produces for NLE Choppa among others, which vocal chain he uses. His answer:
- Microphone: Neumann U87 (approx. €2,700) or Sony C800G (approx. €12,000)
- Preamp: Neve 1073 (approx. 1700€)
- Compressor: Tube-Tech CL1B (approx. 3700€)
This vocal chain is cheaper than the first, but still quite expensive. However, there are many plug-ins that can mimic the sound of this device.
3. Ariana Grande (Producer: Billy Hickey)
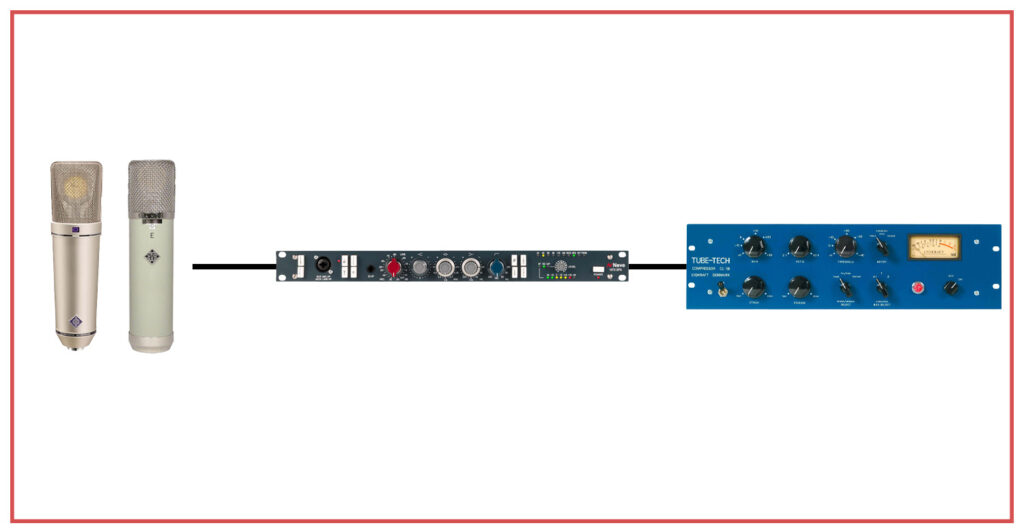
Billy Hickey writes in his own blog what he uses for a vocal chain, and he's a bit more flexible:
- Microphone: Depends on the artist, but he likes to use tube microphones from Neumann (U67) or Telefunken (Telefunken ELA M 251). Sometimes he brings his own, a Soundelux iFet 7, if none of these are available.
- Preamp: Neve 1073
- Compressor: Tube Tech CL1B