What are Stems?
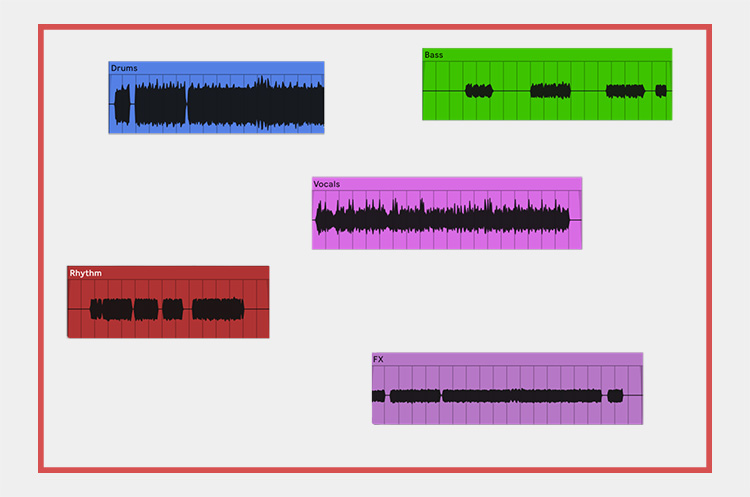
In the world of music production, stems are groups of tracks in a song that form a unit. This means that if I have a kick drum, a hi-hat and a snare drum in my song, together they form the stem of the drum kit.
Or the track's piano and guitars form the rhythm stem. There are no rules for forming stems, but it must make sense in the context of the song.
There are basically the following stems:
- Lead Vocals
- Background vocals
- Drums
- bass
- Rhythm instruments
- Lead instruments
Of course, you can subdivide these stems even further, e.g. into piano and organ instead of rhythm, or the drums into drums and percussion - the more specific you get, the more groups you end up with.
What do we need Stems for?
So audio stems are parts of a larger musical whole. They help us divide and organize our mixing process - if I mix the individual tracks into groups first, I only end up working with 5-7 groups instead of 30 individual tracks.
The use of stems in music production has several advantages:
Mastering flexibility
Working with stems, you have a lot more flexibility in the mastering process because the individual groups are available. So if the bass is too weak, I can just add the stems from the bass and make it louder instead of using a multiband compressor.
You can even turn down an instrument in your final mix by reversing the phase of that group and mixing the track together with the master track. It would be better not to have to go that far by making a reasonable mix, but it's a good emergency solution for mastering.
You can also use stems to apply different effects to different elements of the music. For example, you can add reverb to the vocal stem to make it sound more spacious, while keeping the drums dry.
Or apply compression to the drum stem to give it more punch while leaving the bass stem uncompressed.

Enormous time saving during mixing
Mixing with stems allows for more efficient adjustment of multiple tracks simultaneously. Instead of adjusting levels, panning or effects for each track individually, a group can be used to control multiple tracks simultaneously.
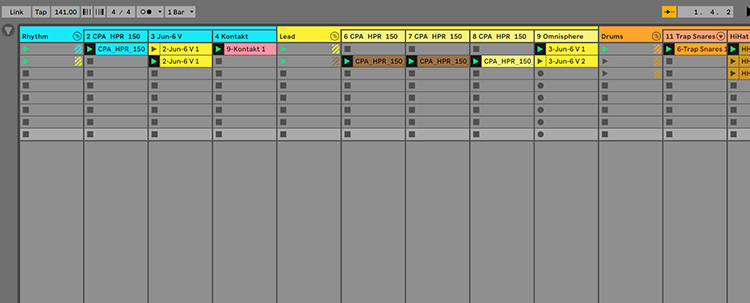
This saves time, as fewer adjustments have to be made in the final mixing phase, and enables an efficient way of working. Especially in this phase, you tend to go around in circles if you don't use groups, because you have to remix everything when changing a single track.
Remix
With Stems, new remixes of a song can be created because the remixer can choose which elements of the original mix to use and how to edit them. For example, I can keep the vocals from the original and still produce a new bass line and new drums for my remix.
Some remixes differ only minimally from the original version, which means that many stems of the original were used. If the remix is very different from the original version, it means that only a few groups of the original were used and a lot was produced by the artist.
Stems are often found online, especially in the context of competitions organised by producers to give everyone the opportunity to remix the song and choose the best one at the end.
Archiving/Export
Stems are especially important when mixing analogue and there is no console with a "total recall" function available, as in this case there is no way to save a project to recall it later.

But there is also a roundabout: When my mix is ready, I create stems (groups of tracks). But I leave the fader (or VCA) of each group at 0 and then export only the individual groups.
If I then want to open my project again to change a small thing, I simply import the stems and leave them all at 0 again - then I have exactly the same mix as the first time, but can, for example, make the vocals a little quieter or louder.
Collaboration
Stems can facilitate collaboration between different music producers or sound engineers by allowing them to work independently on different parts of a song.
A practical example: In today's world of hip-hop and trap producers, it's common to have one producer for the drums + 808 and another for the melody/harmony. This kind of collaboration is only possible through stems - unless both producers work with the same DAW.
It is also much more practical to send someone a project with 6 stems than a project with 60 tracks - everything is much clearer and you save a lot of frustration on both sides.
How do I create stems?
Exporting stems from your DAW is not complicated. Depending on which DAW you use, the process is slightly different.
If you have created groups and the DAW allows you to export the groups directly (Ableton Live allows this), you can easily export the individual groups.
In Ableton Live, first select the tracks of the group, then click on "Export audio" and select the option "Selected tracks only".
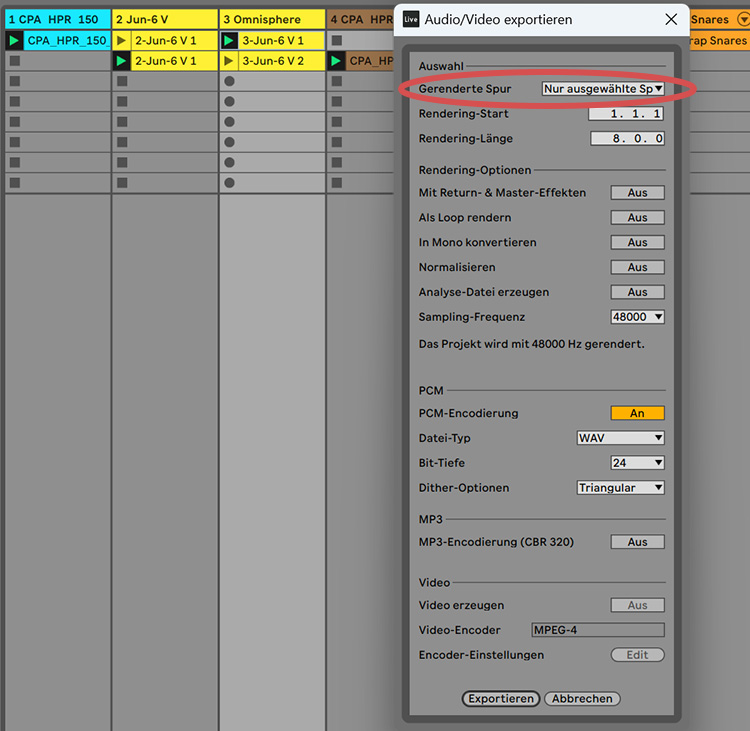
Otherwise, you have to do it through routing, either to a bus or you create stereo tracks where the channels are routed to. I prefer the latter option, as it allows me to apply VST plugins to my groups.
In Pro Tools, you would have to create stereo aux inputs for each stem where all the channels in the group are routed, and then export those individual stereo channels.
Where do you find stems for remixes?
As already mentioned, audio stems are the basis for remixing songs. Without them, no one can remix my song unless they use the same DAW as me. However, it is not common to remix whole DAW projects - the convention is to use stems.
There are different methods to get stems:
Search online
You can find many stems easily via Google by searching for something like "stems for remix". There are many websites of labels and artists that offer them for download, many even for free.
I've put together a small list of free stems of songs available online that you can instantly download to make your own remixes.
- Song: Power, Artist: Hardwell, KSHMR
- Song: Come Stay With Me Tonight, Artist: Unkle Ricky, MYNXY
- Various Songs, Artist: Koltbach
- Song: Hang Over, Artist: Black Dave
- Song: Rave On, Artist: Karetus
- Song: Nothin', Artist: RYZY
There are always remix contests on metapop.com where stems of songs are made available for everyone - keep an eye on it to stay up to date.
Contact artists directly
Nowadays, it is also very common for artists to network with each other and exchange stems in order to collaborate. In general, you should look for artists who have a similar reach and fan base as you do - because it's unlikely that someone like David Guetta would collaborate with a completely unknown artist.
You can easily search for and contact artists via Instagram - this method is usually very effective if you have a well-maintained artist profile yourself (so you need to appear serious).
Remixes always benefit both artists, as they both reach new potential fans. Best of all, thanks to stems, you can collaborate with musicians from all over the world, whether it's Japan, Germany, the US or Brazil!
sample libraries
There are many sample libraries with countless stems - the best known of all is Splice. There you will find drum loops, bass loops, guitar loops etc. However, these are rather intended for complete productions, as all samples are 100% royalty-free.
There are no stems from well-known songs, but there are some loops that were used by very well-known artists for their hits. You can use them all immediately in your productions or remixes without copyright concerns.
Keep reading: What are LUFS and why are they important?


